Past Work - Coral
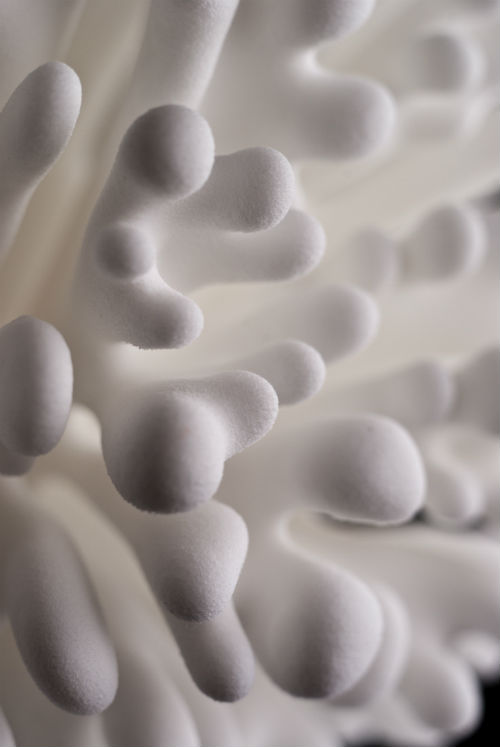 | My starting point was this photo. It's a 3D print in laser sintered nylon of "Laplacian Growth" that I found on this flickr page posted by Jessica Rosenkrantz . I Googled Jessica and found her at "Nervous System", which describes itself as "a generative design studio that works at the intersection of science, art, and technology. Drawing inspiration from natural phenomena, we create computer simulations to generate designs and use digital fabrication to realize products." I wanted to try and create a glass version of Jessica's design by printing it in wax or an equivalent plastic from which I could create a mould. Jessica very kindly allowed me to download the .stl file she had used on the basis that I keep her informed of my progress. After a little bit of tinkering and some help from Ian Hankey, the lecturer in charge of Plymouth College of Art's "Fab Lab" the file is now in a queue to be printed in the next day or so. |
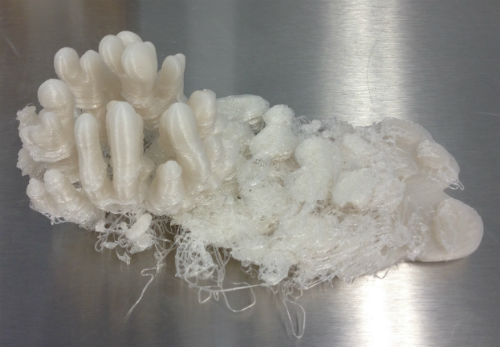 | 2nd December 2014: The first attempt at printing the file hit problems. It looks as though the print got knocked sideways successively as it was being layed down. Ian Hankey speculates that it might be because the raft it was built on was too smooth, so we're trying again, this time halting printing after building the raft to put some double-backed sticky tape down. Should see the result tomorrow. |
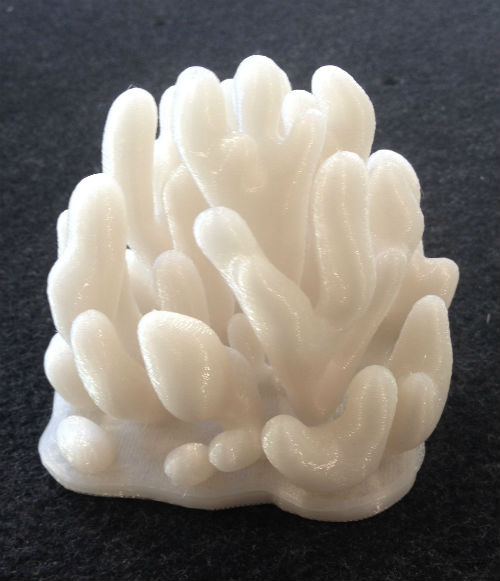 | 3rd December 2014: Success! |
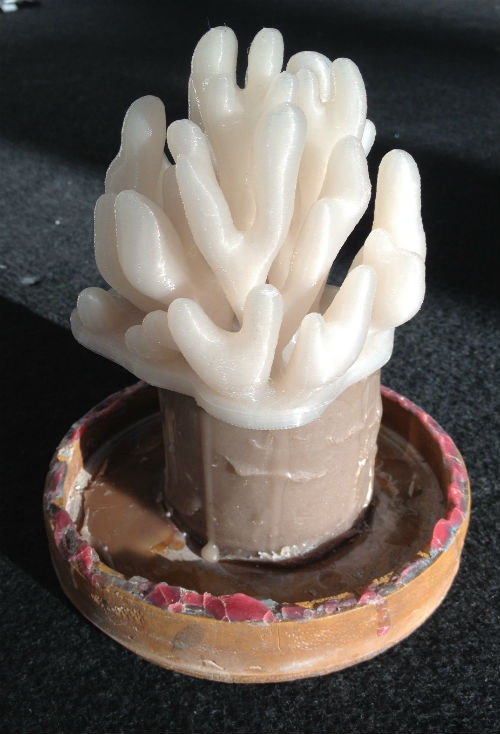 | I've now mounted this on a wax cylinder with a view to creating a plaster mould. The brown wax cylinder is sitting on a rubber dish that will seal off a flask, enabling me to use vacuum to suck out any bubbles in the plaster. |
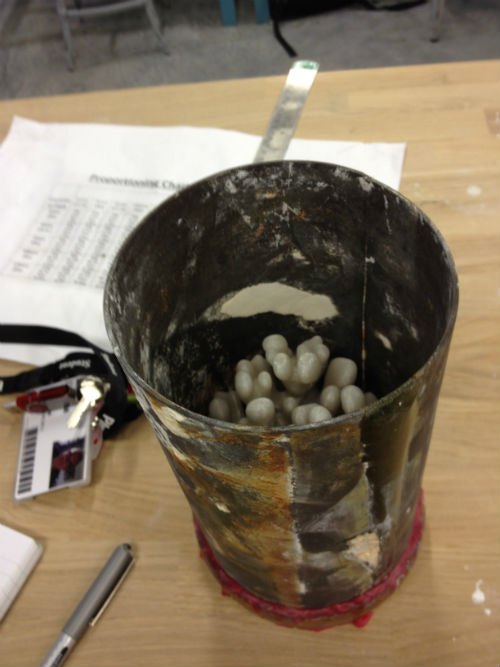 | 5th December 2014: It turned out there has been a misunderstanding
about the wax cylinder. To cut a long story short, I put in some wax
sticks between the cylinder and the base of the 3D print to prevent
bubbles getting trapped when I'm casting the glass. The wax cylinder sits on a rubber tray that serves as the bottom of the "vacuum flask" pictured. The joint between the tray and tube is sealed with wax. |
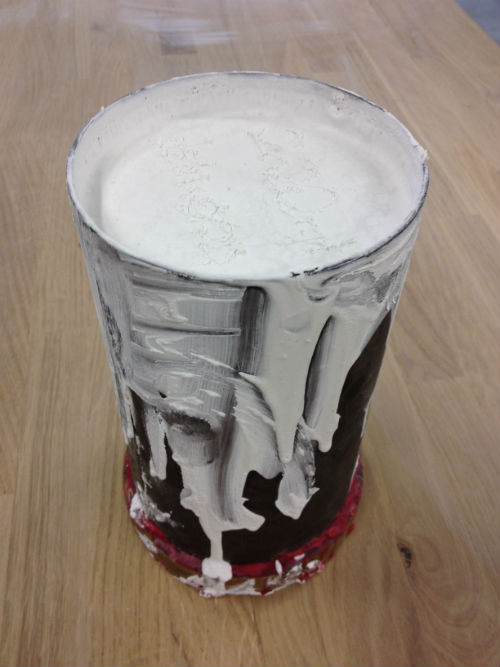 | The plaster is mixed for 3.5 minutes and then put in a vacuum chamber
for 1.5 minutes to remove the bubbles in it. It's then poured into the
flask and the flask is then put in the vacuum chamber for another 1.5
minutes to remove any further bubbles. End result in photo. |
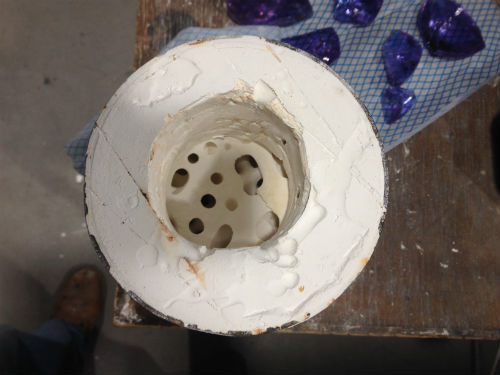 | 9th December: After the plastic and wax had been burnt out of the
plaster mould the top was a bit cracked, and when I turned it upside
down a flake of it fell out. Removing the loose plaster was probably a
good idea and I don't think it will make a lot of difference to the
finished piece - it just means the coral will be sprouting from an
irregular shaped base - just like it would in nature. I decided to use lilac colour Gaffer glass - looks pink in some lights and blue in others. It was a bit tricky stacking enough glass in the reservoir above the coral, and it was difficult to prevent the plaster coming off onto the glass. I've allowed for about a bit more glass than I measured so I'm hoping that will compensate for the plaster that fell out. It's now being fired. Fingers crossed! |
 | 11th December: Out of the kiln |
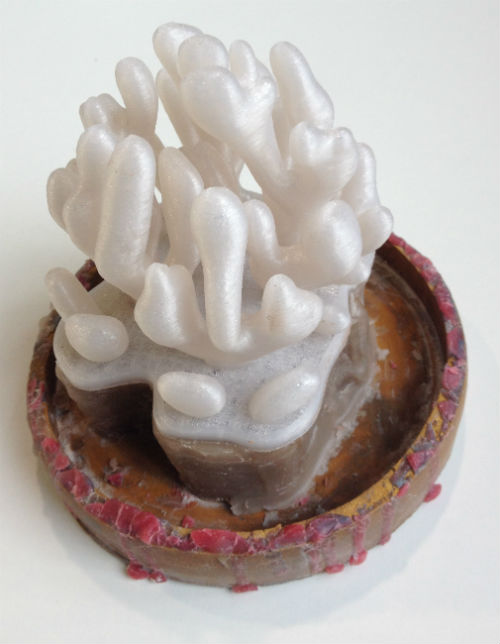
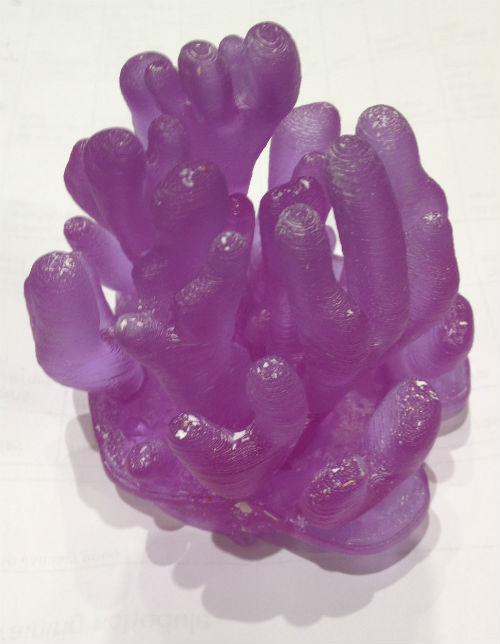 | I put this in a pickle bath of acid to loosen the plaster and then picked away at it. I need to grind the base flat. Also, there's quite a few specs of plaster inside the glass. I'm debating whether I should sand-blast the whole thing. I could get rid of the specs of plaster that way but it would also make the striations between the layers of 3D printed plastic become less clear. I can't make up my mind whether that would be a good or a bad thing! |
I've now decided what to do next on this project, which is to move ahead in 2 directions.
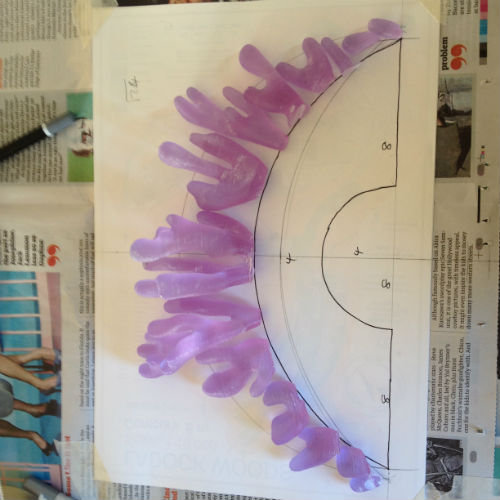
1. Large scale single branch of coral
This is to make the most of the organic shape coupled with the machine-made striations created during the 3D printing process. I'm going to park this idea while I proceed with....2. Embed the existing branches in a glass object
|
| As I've got enough lilac Gaffer glass to repeat the process so far,
I've done a second 3D print and mounted it on the base of a vacuum flask
ready for creating a second plaster mould. This time around I've made the wax base much shorter thinking I would trickle the glass into the mould to try and avoid plaster contaminating it. I've also made the wax the same section as the 3D print raft so there's no chance of air getting trapped. |
 | I managed to break 2 branches off the first glass cast while trying
to remove plaster from the striations so I've now had all the other
branches sawn off and I'm playing around with how to incorporate then in
a glass "object". My first idea is to dot them around a
cast glass disc. Mock up with the first half of my coral branches
below. I need to think this through some more, and figure out an
elegant way of incorporating a base. 29th January 2015: I've now printed a second copy of the original file and made a plaster cast in the same way as before, with a view to using the remainder of my lilac Gaffer glass to make a second batch of coral branches. I've also decided to make them stand on a sort of semi-circular arch in clear gaffer glass. |
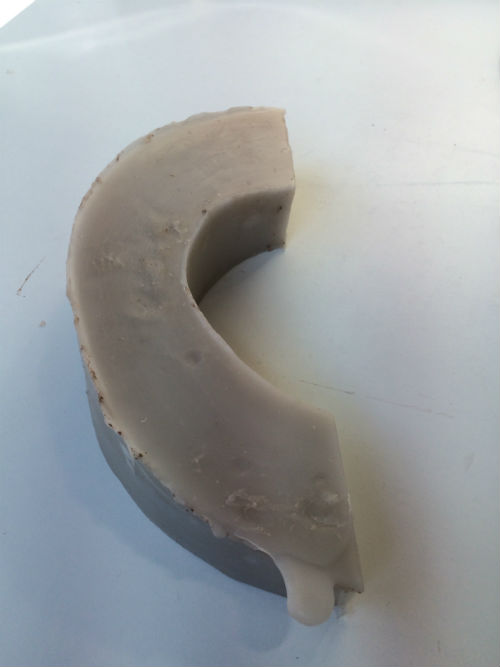
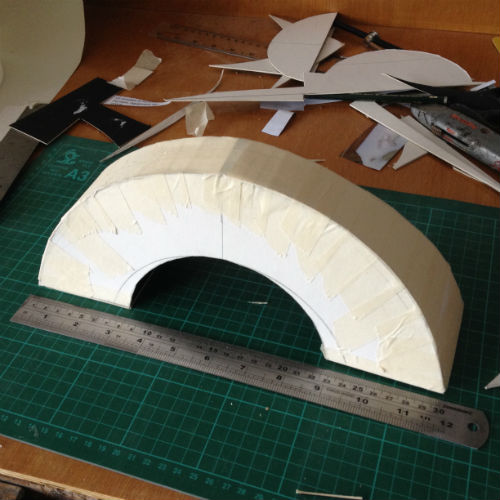
 | 2nd February 2015: More playing with the shape of the thing under the coral. I've decided to go with what looks a little like an old bridge. |
|
| I made a model of this one and decided it looked too small and wouldn't
give me enough room for all the coral. So I scaled things up by 25
percent and now think I have the right shape and the right size. |
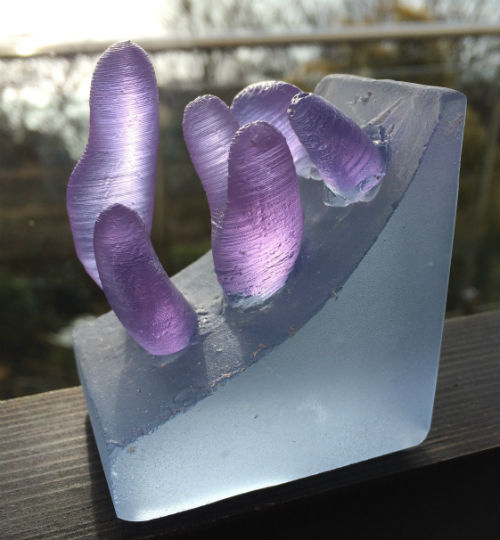 | 19th February: I've made this test piece to see whether I could bond my existing bits of coral onto another bit of glass. It worked! Also, there's no leakage of the coral's lilac Gaffer glass into the pale blue Gaffer glass. |
 | 19th Feb 2015: The 2nd year glass students had a critique of each other's work. Previously I had been experimenting with further shapes, making plaster and acetate (transparent, so I could see the interior surfaces) models. I brought them all along and got some good feedback. The consensus was the shape pictured, laid on its side with it tapering from just 2cm at one end to maybe 7cm at the other, and with just a single piece of coral on the outside surface at the high end. I made one in wax, pictured, and then decided it would be better if it was a bit more than a semi-circle - so (as of mid March) I'm still experimenting with the shape. |
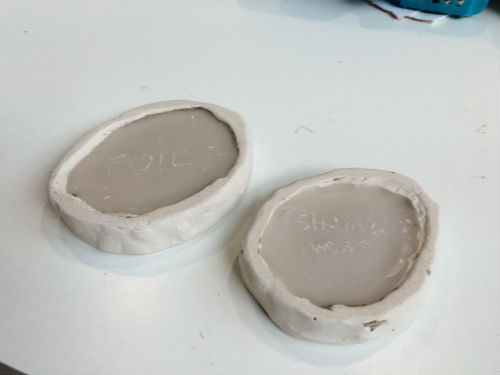 | 17th March 2015: I've decided to polish the flat surfaces and leave the curved surfaces as-cast, so I've been experimenting with ways of making the as-cast surface look interesting. These are test pieces for surfaces created using (left) aluminium foil scrunched up and then flattened out as it was pressed into clay and (right) the same sort of thing with cling film. I had some clear Bullseye glass going spare so I used that in the 2 moulds that went in the kiln to be fired today. |
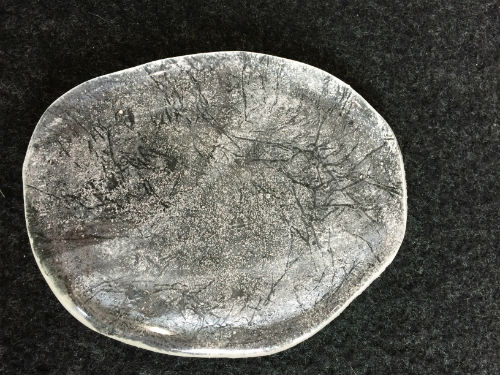 | This is the aluminium foil test piece. I like the veins in it but I should have used smoother clay. |
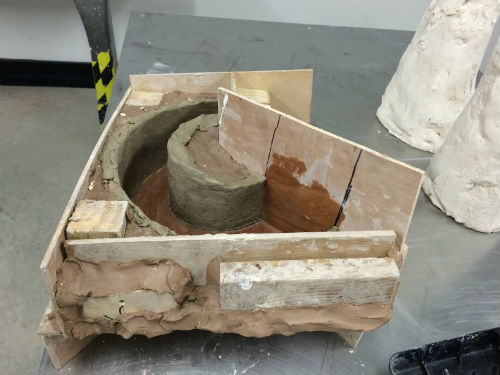 | I replaced a layer of (brown) 'krank" clay with much smoother (grey) stoneware clay. I then scrunched up aluminium foil, unscrunched it, pulled it into random pieces and pressed it into the clay. Then I painted the wood surfaces with silicone oil, removed the aluminium foil and poured in hot wax. |
 | End result. I poured the wax as high as I could, thinking I will need extra depth to stack the glass. |
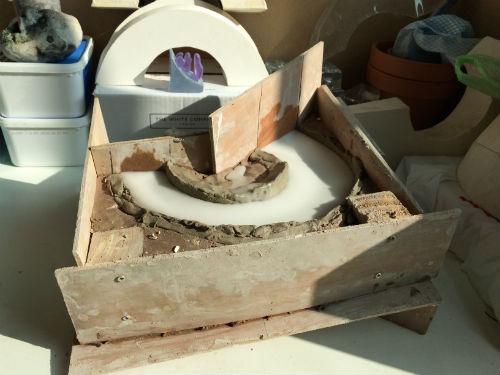
 | Preparing to create the flint and plaster mould. I embedded the piece of coral, on the left, in a soft "inclusion" mix of flint and plaster. I then warmed it up in a steamer, pressed it into the wax at the same time as supporting it on a ball of clay |
 | Making the mould. Two coats of flint and plaster at this stage. I did two more coats, adding glass fiber to the mix. |
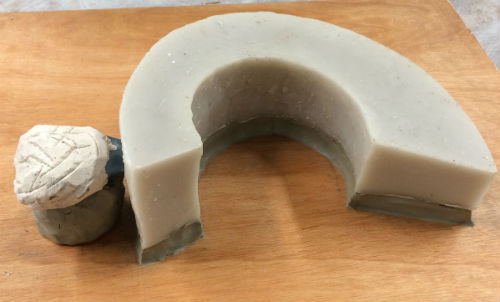
 | Mould after steaming out the wax. I almost abandoned it because there was a hole just above the coral (just about visible in this photo). I suspected that any repair would show but in the end I did an okay job and decided to go ahead. |
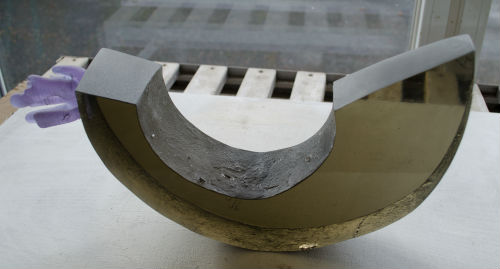
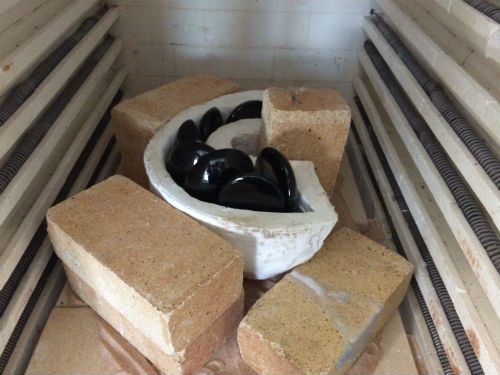 | 1st April: In the kiln, ready for firing. Nice that I could use whole billets of glass. After much agonising over the colour (and light grey being out of stock) I chose dark grey Gaffer. I managed to get the firing started just before the college closed for the Easter break, which is just as well. The annealing process means this is going to take almost eight days to fire! |
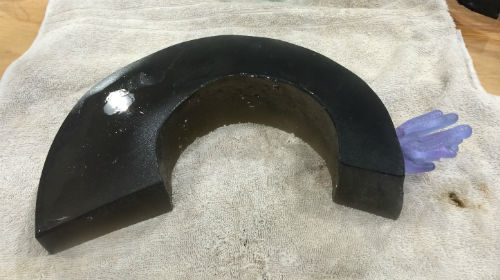 | 13th April. The firing went well and today I got it out of the kiln, removed the plaster and started grinding. I'm paranoid about bumping the coral! |
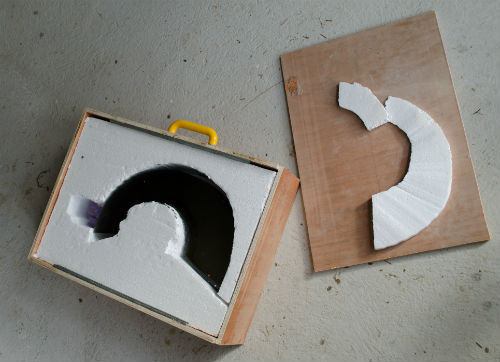 | I was so paranoid about bumping the coral (or anything else) that I ended up making this box to transport and store it. I ought to change the polystyrene for foam rubber - would make it easier to extract the object. |
 | 27 August: I haven't done anything to this since the end of term. Everything went well on the polishing and grinding until I got to the fine (800) grit. I made the mistake of thinking it wouldn't be necessary to chamfer the edges at that stage, and I ended up creating 2 shallow chips in the outer surface - you can see one of them, near the bottom, in this photo. |
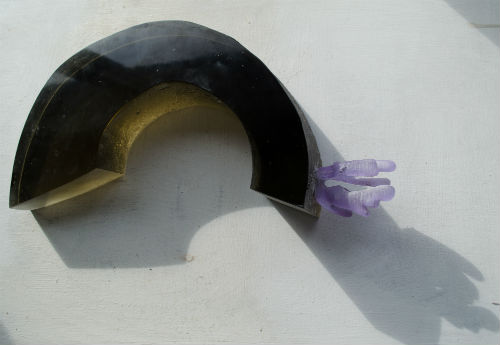 | When I moved on to polishing it on a wheel, I got careless, over-heated a corner and caused a minor crack. Luckily I was able to get the cracked corner removed. I had another issue - getting the 2 flat vertical surfaces on this photo to be truly flat. I couldn't hold the glass steady enough on the grinding wheels to stop it rocking backwards and forwards (partly because I had to make sure I didn't bump the coral at the same time). The bottom line is: 1) I've ended up renewing my hatred cold working glass 2) I've concluded that I probably need to do the remainder of the grinding and polishing by hand, which is probably going to involve a huge amount of time. 3) The idea of doing this is not appealing - too boring. 4) I should probably experiment with how I'm going to deal with the shallow chips before I spend a huge amount of time on polishing - and that takes some courage! |